Skip to Main Content

NSU Halmos College of Arts & Sciences Thesis and Dissertation Submission Guide: MS Word Tips & Tricks

Instructions for NSU HCAS students submitting finished work from their thesis or dissertation for graduation.

Tips & Tricks for MS Word

Review this page for tips and tricks that help students when formatting their capstone/thesis/dissertation.

For the full Microsoft Word LibGuide, click here


Formatting Page Numbers for Different Sections

  1. Click between two parts of your document that you want to number differently.
  2. on the Page Layout Tab, Click Breaks.
  3. Click Next PageEven Page, or Odd Page, and then click OK.
  4. Click in the first section of your document.
  5. On the Insert Tab Click Header and then Click Edit Header
  6. Click in the header or footer where you want the page number
  7. On the Header & Footer Tools tab Click Page Number
  8. Click The option that puts the page number where you would like
  9. On the Header & Footer Tolls tab Click Page Number
  10. Click Format Page numbers
  11. In the Number Format box, click the format that you want for the numbers in this section.
  12. Do one of the following:
    • If you want the page numbering for the first page in this section to start at a particular number other than the first number in the format series, click Start at under Page numbering, and then enter the first number that you want to appear on the first page of the section.
    • If you want the page numbering to continue from the previous section, click Continue from previous section.
  13. Click OK
  14. On the Header and Footer tools tab, click Next in the Navigation Group
  15. Repeat steps 1 through 3 and 9 through 11 to change the page numbering for another section
  16. On the Header and Footer tools tab, click Close

Rotating Landscape Page Numbers to Match Portrait Layout

Rotate Landscape page numbers to match Portrait layout.


This article details how to rotate landscape page numbers to match the Portrait layout.

What you may have:
rotateexample1.png

What you might WANT:
rotateexample2.png
 

1. First, be sure that you have created section breaks (not just simple page breaks) in order to allow for the portrait and landscape pages.

2. On the Header and Footer toolbar, click Link to Previous so that the button appears off (not depressed).

linktoprevious.png


3. Double-click in the footer area to display the Header & Footer Tools Design tab of the Ribbon. From the header and Footer group, select the Page Number down-arrow…

stepone.png
 

4. Select Page Margins and then Vertical, Right.

steptwo.png

5. The number will look something like this:

pagenumber.png

6. Select the text box and select Text Direction from the Drawing Tools, Format menu.

step3.png


 7. Clean up the number formatting with the normal page tools on the HOME tab such as sizing the font and aligning the page number to the right.

alignright.png

8. When you’re done the number should be in the same direction as your other portrait pages.

done.png

How to right align manually created Table of Contents

Show dots or leaders between tabs

The space between tabs can show dots, dashes, or other “leader” characters to line up information, such as a directory.
  1. Type your text and on the horizontal ruler set your tabs.
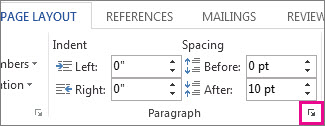
  2. Click Page Layout.

  3. Click the small arrow in the bottom of the Paragraph section to open a window with more options.

How to get to all paragraph options

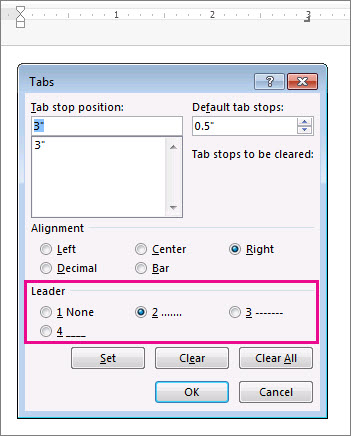
  1. Click Tabs, then under Leader, click the dotted lines or other leader you want displayed.

Tip:  There is another method for leaders if you are working with a table of contents

Tip:  Set the Tab stop position to 6" in the example below, not 3"

Tab Box Leader

When you start a new line, the formatting will remain until you start a leader.

Note:  You can have more than one kind of leader if you have multiple tabs. Click each tab in the Tab stop position box and select a different leader.